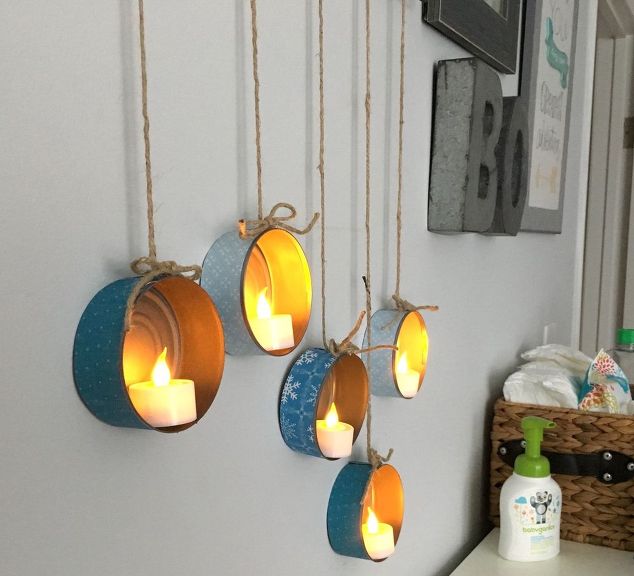


STEP 4: Hot glue bows and twine strings to can
As you can see, for this step I adhered the bows and twine strings to the cans. I first glued the end of the twine string to the can (I glued it at the seam of the paper), then I glued the bow on top of the end of the twine string.

STEP 5: Tie finished cans to hanger and add tea lights
Don’t forget your tea lights! You can use real tea light candles but I wouldn’t recommend it as you never know who is going to come along and bump the wax out.

To hang these finished cans, I simply tied the other end of the twine to the bottom of a wire hanger. Because these hanging in our son’s room, I wasn’t so worried with the rustic look of a plain wire hanger; however, if you’re hanging you’re cans somewhere prominent, you can always add some garland or burlap ribbon to dress up the hanger.

I love how simple and easy this project was…and how cute it turned out! The beauty of this project is that you can make them look however you wish because of the different scrapbooking paper and ribbon that is out there!
Materials I used for this project:
- Tuna cans (on hand)
- Scrapbooking paper (on hand)
- Cutting mat (on hand)
- Ruler (on hand)
- Hot glue gun/sticks (on hand)
- Box cutter (on hand)
- Twine (on hand)
- Scissors (on hand)
- Tea light candles (Dollar Tree)
- Wire hanger (on hand)
Source : hometalk