
Turn a plain Jane dresser into an apothecary chest. Once all your friends know that you made it, they will want one too!
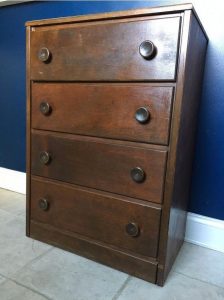
I had this old dresser standing in the basement waiting out there in the dark for a revival. However, I had no idea how to make it happen. So…
I went to Pinterest and found a few ideas, but I had no skill or previous experience to tackle the makeovers I liked best. Instead, I searched for classes where I could learn the skills I needed to actually make my dream come true. Luckily, I found Barb Blair in this video:
She has a few classes that are great for anyone who would like to turn an old beast into a glorious beauty! I started with a furniture refinishing class, which covers stuff like sanding and prepping, then a second class about the painting basics . I was so excited!!! It was the perfect way to learn the skills I needed. Afterward, I felt ready to start my project.
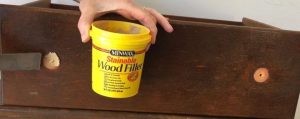
Step 1: Begin by removing all of the hardware from the dresser then filling the holes with wood filler
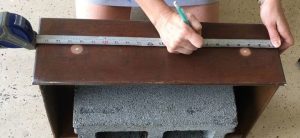
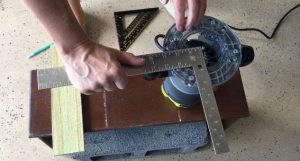
Step 2: Remove the drawers and measure the length of each drawer.
If you are adding three false fronts on to each drawer, divide your measurement by 3 to determine how large each false front will be.
(The cinder block is inside my drawer because I did all of my work on the floor and needed stability. This is not necessary if you have a work area where you can clamp your drawers safely)
Use a straight bit in your router.
You will need to make a guide for your router so your grooves are straight.
Determine the distance between the bit and the edge of the router plate.
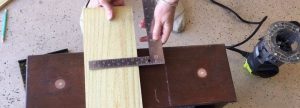
Place a piece of board on the front of the dresser and clamp it secure.
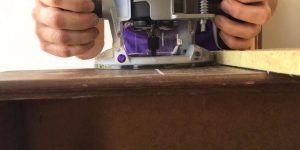
Place your router on the drawer front to determine the depth of your bit and adjust accordingly. I used a 5/8″ bit.
Before you begin to router, measure again and again – use the old adage, measure twice, cut once.
Step 3: Using the piece of wood as your guide, router two grooves into the drawer front. You will have to move your guide with each groove you make.
(This was the first time I used a router so I was very nervous. I watch a few YouTube videos first then practiced on a piece of scrap wood before making any cuts to my dresser. Once you’ve got the hang of how to use the router, you’ll be ready to go.)
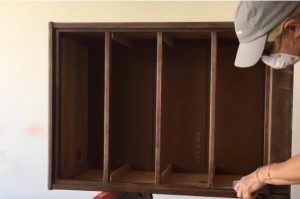
Step 4: Once all of your drawer fronts are routed, sand the entire dresser including the drawers.
Wipe everything with a mild soap and water.
Allow to dry.
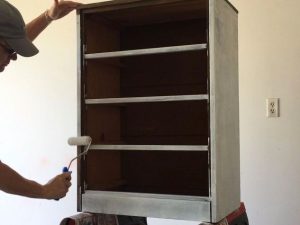
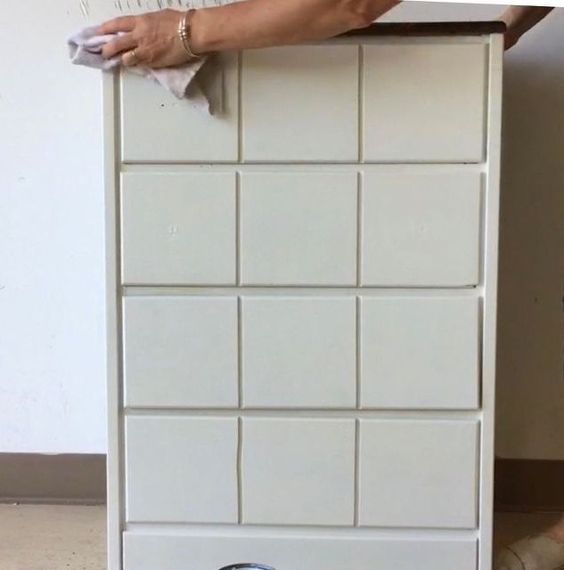
Step 5: Prime and paint the entire dresser including the drawer fronts as you like.
I did not paint the top of my dresser. Instead I chose to stain it a dark walnut.

Step 6: When the paint and stain are dry, put a light coating of wax or sealant on the entire dresser and drawer fronts
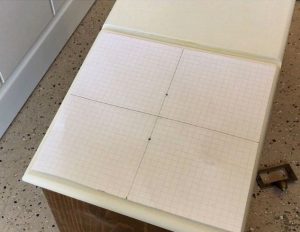
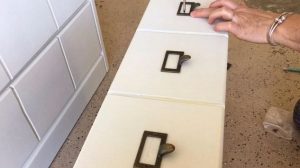
To determine where the hardware should be placed on the drawer fronts, make a guide.
Cut the guide the size of the false fronts and find the center.
Lay your hardware on top of the guide to determine where the nail holes will be made.
Lay your guide on each false front and using the guide, mark where the nail holes will be.
Step 7: Pilot holes do not have to be drilled as the nails are very tiny and will easily be able to be screwed into the wood.
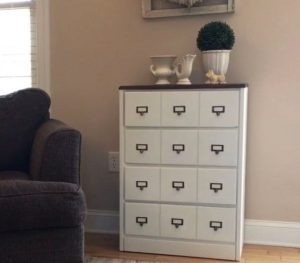
Your new apothecary chest is now ready for you to enjoy and it will be the envy of everyone! Now I’m already looking forward to my next project… I took another class (I couldn’t help it) about paper and decoupage on furniture! Does anyone have an old piece of furniture they’re looking to get rid of? 🙂
source:hometalk.com by Alicia W