Incredible Recipes

Menu
  • Home
  • Just For You
  • Popular Now
  • Quick And Easy
  • Seasonal
  • Tips
Home
Just For You
Build an Easy Bathroom Shelf Diy

Build an Easy Bathroom Shelf Diy

Follow me on Mama guide recipes

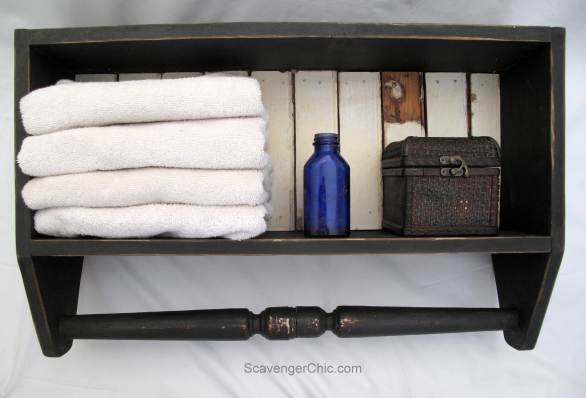
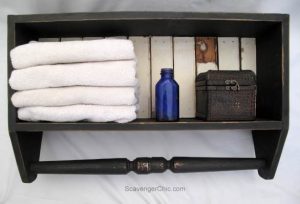
If you’ve always wanted to create something out of wood but the directions seemed too intimidating, I’ve got the project for you. Today I have a super easy bathroom shelf that is put together just like a toolbox with the exception that the opening is in front instead of on top.
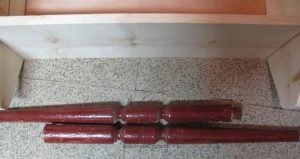
This project came about because I’m still using up a pile of spindles that my brother gave me. It may look like I only used one spindle, but I actually used two. You’ll see why in just a second.

For the shelf, cut 3 equal pieces of a 1×8, 25″ in length.
This is a great time to use up any scrap wood you have laying around. If you don’t have scrap wood, you will need one piece of 1×8, 10 feet long.

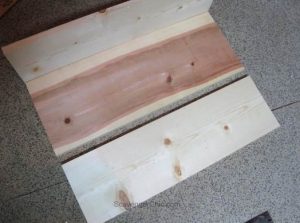
From the same 1×8, cut two more pieces 17″ in length. These will be your ends.
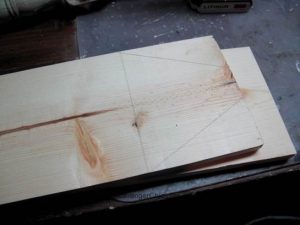
On the two boards that were cut to 17″, mark the center and where the bottom of the shelf will hit. From the center of the board, measure out 1 inch on both sides and make a mark. From that mark draw a straight line to the mark you made where the bottom of the shelf will sit. If that didn’t make sense, look at the picture below.
Slightly round off the top corners and cut with a jigsaw.

For the spindle rod, I ended up using 2 spindles so that I could center the decorative part of the spindle on the shelf. The spindle also tapers down on one side; by using two, both ends will look exactly the same.
Cut the spindles in half at the decorative part. On one side I left the ridge, and on the other side it was cut off. Drilled a hole and inserted a dowel in both sides for extra strength.
Once the glue on the spindles was dry, cut the dowel to the measurement of the outside of the shelf which should be about 26 1/2 inches. You’ll probably have to trim a bit off of both ends to ensure that the decorative part of the dowel remains in the center.
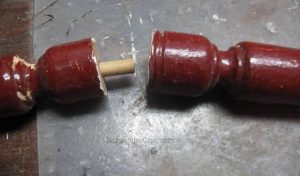
On the end pieces of the box, use the end of the dowel to mark how big a hole has to be drilled to insert your dowel. Make sure it’s centered then drill away.
Finally, start to assemble the box. All of the pieces should be attached with finish nails and wood glue. Make sure you insert the dowel before attaching the last end piece.
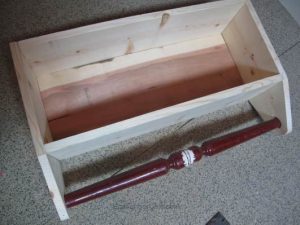
Fill all your nail holes with wood putty and sand all the rough edges as well as the the filled holes.
The entire box was finished with a coat of black chalk paint.
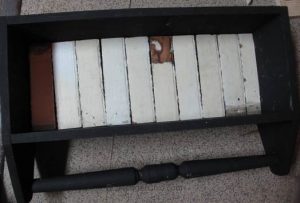
Old beadboard trim was cut to fit the interior of the box.
Shelf was sanded down again to reveal some edges, then finished with a coat of dark wax. The white beadboard got a coat of clear wax to seal in some of that old paint.
This is a great project for someone just beginning to do woodworking (or me). Straight cuts all around and super easy to paint to match your own decor.
source:hometalk.com by ScavengerChic
Print Friendly, PDF & Email

  • Pinterest
  • Facebook
  • WhatsApp
  • Yummly
  • Facebook Messenger
  • Twitter

Related Articles:


  • Tuna Macaroni Salad

  • How to Make Banana Bread in a Mug

  • DIY Wood Crate

  • The secret to Perfect carbonara!

  • Lancashire Hotpot

  • No Bake Energy Bites
Prev Article
Next Article

Popular Posts

  • BAKED HAM AND CHEESE MOZZARELLA STICKS
    February 24, 2018 4
  • This Easy Apple Dumpling Pastry Is All …
    August 27, 2017 2
  • My Favorite Peanut Butter Cookies
    September 14, 2017 2

Incredible Recipes

Copyright © 2025 Incredible Recipes
DMCA - Privacy Policy - DISCLAIMER - Contact
This website uses cookies to improve your experience. We'll assume you're ok with this, but you can opt-out if you wish.Accept Read More
Privacy & Cookies Policy

Privacy Overview

This website uses cookies to improve your experience while you navigate through the website. Out of these cookies, the cookies that are categorized as necessary are stored on your browser as they are essential for the working of basic functionalities of the website. We also use third-party cookies that help us analyze and understand how you use this website. These cookies will be stored in your browser only with your consent. You also have the option to opt-out of these cookies. But opting out of some of these cookies may have an effect on your browsing experience.
Necessary
Always Enabled

Necessary cookies are absolutely essential for the website to function properly. This category only includes cookies that ensures basic functionalities and security features of the website. These cookies do not store any personal information.

Non-necessary

Any cookies that may not be particularly necessary for the website to function and is used specifically to collect user personal data via analytics, ads, other embedded contents are termed as non-necessary cookies. It is mandatory to procure user consent prior to running these cookies on your website.