

Today I am sharing all the details on the beadboard in the entry! We still can’t get over what a difference it makes in our entry. It adds so much character and gives the front of our home a custom look. If you have been flirting with the idea for a while (like we had), I hope this helps you take the leap of faith to add beadboard to your home! Guys, we love it so much that we added beadboard to our guest bathroom the weekend after we did the entry (details coming soon!).
Let me start by saying this is really easy. I especially love this DIY because any skill level can do this, really! I also have to emphasize it is a really cost-effective to bring a dramatic transformation to any wall in your home! Especially if you buy the 4′ x 8′ sheets, and have Home Depot cut them for your space. It’s amazing how far one sheet can go! There are a lot of great options and tutorials for beadboarding with wainscoting as well. We used a 4′ x 8′ sheet of beadboard for this project, so I am going to strictly stick to how we did it with the sheet. There are many methods and they all come out fabulously! With that being said, pick your wall to beadboard, and let’s take a peek at how we tackled this beauty.
What you will need:
4′ x 8′ sheet of beadboard panel
Moulding for top of beadboard
Trim for sides – necessary for wall we chose, yours may not need this
Level
Jigsaw
Miter box with saw
Hammer and finishing nails or nail gun
Caulk and gun
Liquid Nails
Wood fill, sanding block
White Paint – We used Sherwin Williams Alabaster in semi-gloss
Paint brush
Hooks
Measure for beadboard – First things first, pick the height of your beadboard. We went with 4′ high for two reasons. One, I know the sheets at Home Depot come in 4′ x 8′, so this would give us the most bang for our buck and would require only one sheet to do this area. And two, 4′ and then with the 6″ of trim on the top, is the perfect height for our hooks to hang out of reach of the boys (for now). So that was a super simple decision. From there, I measured my exact sizes for the beadboard. Make sure you check these measurements 1,2,3 or more times. Nothing is worse than getting home and realizing your beadboard isn’t fitting your wall because the measurements are off! I highly suggest having someone at Home Depot cut the paneling for you. For ours, I first had them cut it in half so I had two 4′ x 4′ sheets. Then left the one sheet exactly as is, and had them cut the other 4′ x 4′ sheet for the rest of my long wall and my other two small walls around it. And that was it! I now had all my beadboard from one sheet for $20! It saves so much time and you head home with beadboard that is pretty much ready to go right onto your wall (besides outlet or light switch cuts).
Cut in your outlets/switches and hang it – With your sheets perfectly cut, it is time to hang it. Before applying your liquid nails, I suggest putting your freshly cut pieces on the wall and making sure it is all going to line up perfectly. Once, you see all your paneling fits on your wall as you intended the fun begins! Using a jigsaw, cut in your light switch/outlets, then you are off and running. Apply a layer of liquid nails to the back of each sheet then firmly press it against the wall. I held it in place, making sure it was level and perfectly in line with our baseboard, while my husband secured it with finishing nails. We used the good old hammer and nails method! Of course it would have gone faster with a nail gun, but ours was down and out and we didn’t need many nails because we used liquid nails. The nails are just for the first 24 hours to secure it in place, but from their liquid nails do all the strong work. Side note here – if you think you would ever want to remove the beadboard do not use liquid nails. You would need to most likely re-dry wall after you removed it. Nails would be a better option if you aren’t wanting this look forever, just make sure they go into studs.
Add your moulding/trim – Next, we topped off our beadboard with a piece of moulding. I searched the whole store for a piece that would be wide enough for my hooks and not splinter when screwed into. So make sure your piece of moulding can handle your needs, or it will ruin your final outcome! Then using your miter box and saw, cut your moulding so that each piece fits together seamlessly. Apply liquid nails and top off your beadboard! We secured it with just a few finishing nails into studs. If your wall isn’t closed in, you will want to add a piece of trim or moulding to give it a finished polished look. We used just liquid nails to apply our trim.
Fill, sand, caulk – This is where you really see your project come together. I was feeling a bit worried at this point that our seams were going to show. Well, that was silly! Fill every nail and sand. Next, caulk all your seams. Caulking is the star in this show! Once it was caulked we both were amazed at how easy and fast it all came together! For the top of the moulding, I use the blue painters tape trick. Place a piece of painters tape where the moulding meets the wall, and apply your caulk. Then remove the painters tape almost immediately, and you will have a perfect caulk line without getting it on your wall.
Paint – Using a paint brush, I applied two coats of my white paint, and it was done!
Add your hooks – If you’re using hooks, once the paint dries screw them into your moulding. And that is it! Stand back and awe at your beautiful new wall for under $30 (if you have everything besides the beadboard on hand like we did!).
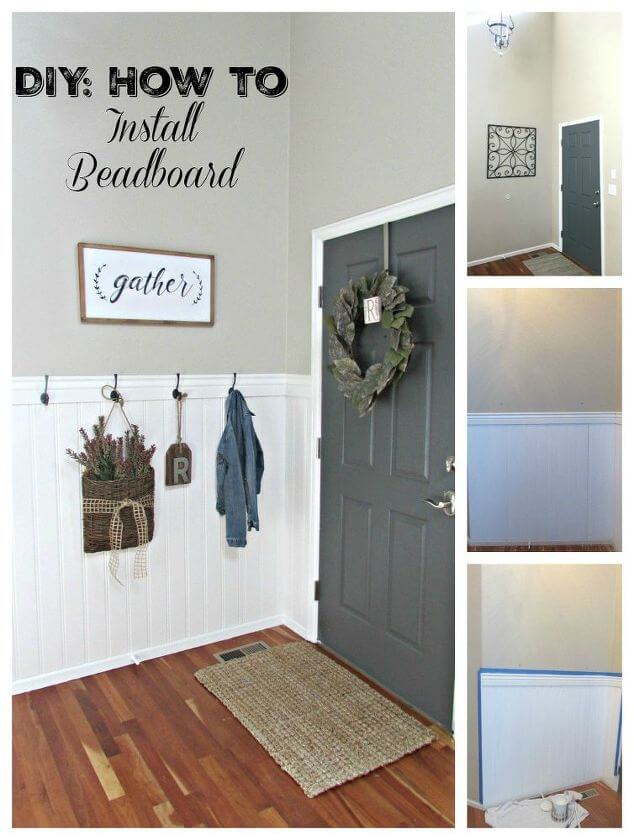
We really couldn’t be happier with the outcome. It was easy, cheap, and made such a huge impact. You can see from the before and after pictures below that we also painted the walls Sherwin Williams Sandbar. Between the new paint in the entry, beadboard, and coat hooks, the entry finally feels updated, welcoming, and rustic!
For all the details visit me at http://www.raisingrustic.com/diy-beadboard-entry/.

Before pictures on the right, and the finished product on the left!

Before: Space we were working with

Before: Added new door hardware and accessories. But still didn’t feel complete!
continue reading on next page (>)
source: aisingrustic.com

Related Articles:
-

Stop Digging Through The Fridge And Make This Ground Beef Casserole -

Domestic Goddess Cake -

DIY Kitchen Art Made From a Repurposed Pizza Board -

Rare Breakfast Bundt Recipe: Prepare For A Major Shift In Your Taste Buds -

This Creamy Crock Pot Chicken Is Angelic – Angel Chicken -
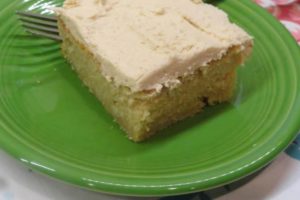
Easy Peanut Butter Cake & Peanut Butter Frosting