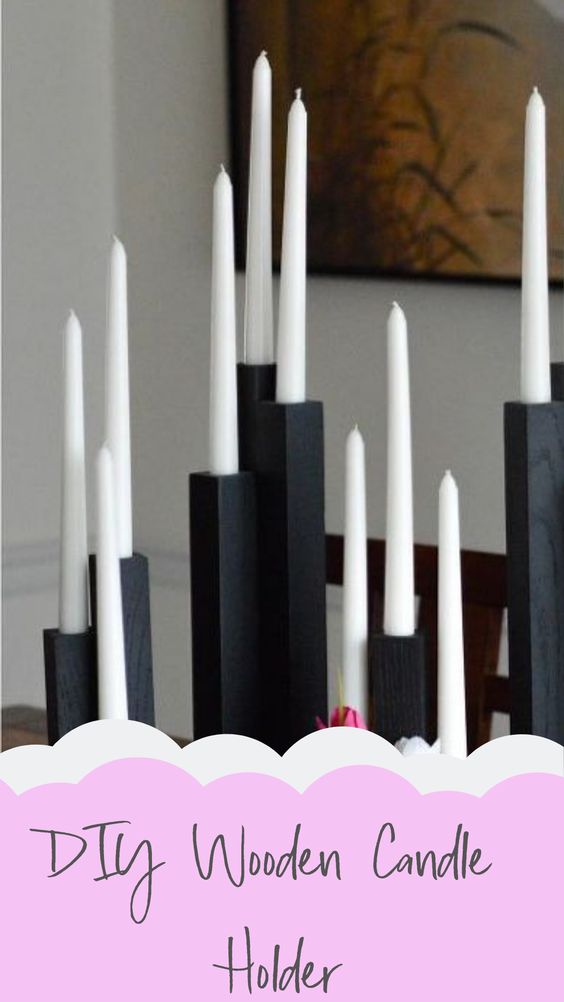

In fashion and decor, I tend to stick with classic designs that can be mixed and matched and retain some staying power. I also love to augment with things I make myself. Most recently, I was inspired to DIY instead of buy these multi-tiered wooden taper candle holders. Let me show you how to make a set for your home, too!

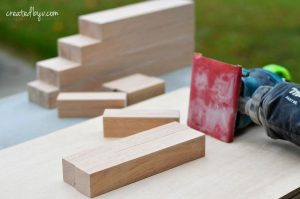
1. CUT WOOD TO LENGTH
Since I used scrap pieces of wood, I ran them through a planer to make them beautifully square. I then cut them to length with a miter saw.
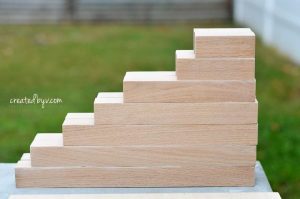
I started with the tallest candle holder at 15″ and worked back from there, stepping down 1-2″. I made a bigger jump near the end as I ran out of wood, but given the way they are grouped, the disproportional lengths don’t take away from the overall statement.
The furring strip noted above is similar in size. You can easily adjust the dimensions and design of this project to fit your preferences.
2. DRILL HOLES FOR THE CANDLES
My husband bought an old tabletop drill press off of Craigslist and refurbished it to running condition. It makes wonderfully straight, flat-bottomed holes at equal depths so easily — add it to my list of favorite power tools!
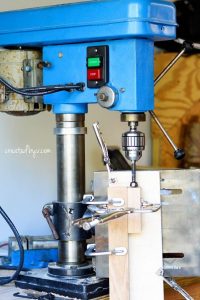
It is fitted with a 7/8″ Forstner bit, which matches the diameter of the candles, and the table is angled to 90 degrees. The work pieces are clamped to this makeshift fixture given the height of the candleholders.
For cleanly cut holes and to avoid burning the wood, bore a bit at a time, back off and then continue drilling (aka peck drilling). Repeat the sequence until you reach your desired depth — these are about 1″ deep.

If you don’t have a drill press, you can accomplish this step using a handheld power drill fitted with a spade bit. Mark center on the top of each holder, secure in a vise and drill the hole about an inch deep.
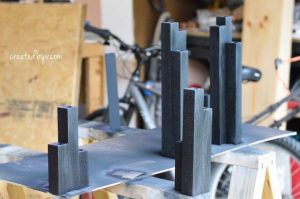
3. SAND AND GLUE
Give each piece a quick sanding to smooth any rough patches and prepare the wood for paint. Wipe clean.
To prevent a strong wind from knocking the taller holders over, I glued them to two shorter ones. As a trio, the holders have greater weight and stand solidly upright.
Position them in formations that are attractive to your eye. Apply wood glue and clamp together to dry overnigh

4. PAINT
I used black chalkboard paint so I didn’t bother with primer. However, wood absorbs paint so a coat or two of primer will use less color and help the paint go on smoother. Take your time applying several light coats of paint; cover all sides while avoiding drips and runs. Let the paint dry overnight.
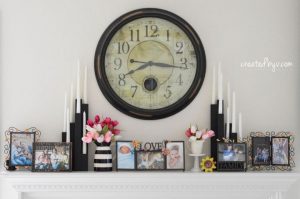
Once the holders are dry, use a few drops of wax to secure each candle in its holder. And that’s it!
The candleholders look fantastic on the fireplace mantel in our family room.
And as a table centerpiece.
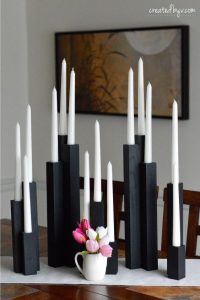
I love their sleek design, and they cost near to nothing as I had all the wood left over from other projects.
If you like DIY projects like these, please visit the blog and to the newsletter for updates. You’ll also receive creative inspiration for simple recipes, home decorating and much more! Thanks for reading! — v.
source:hometalk.com by Vernichel // created by v.