

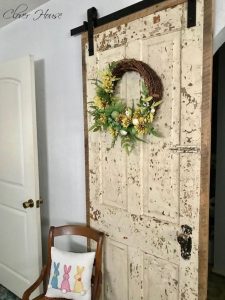
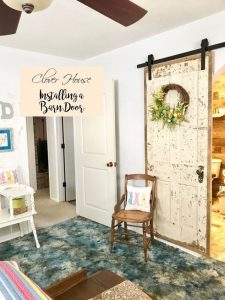
I finally got a sliding barn door in my house! I’m so excited, can you tell? I knew I wanted a barn door in our bedroom because the door way to our bathroom doesn’t have a door. It really doesn’t bother us not having a door, but to me it was the perfect place for the sliding barn door.
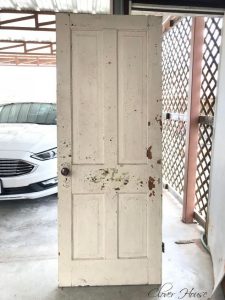
We have had this door for years just standing in the shop waiting patiently to be inside our home. Every now again we decide to do a little project in our home so this is what we came up with for our most recent idea.
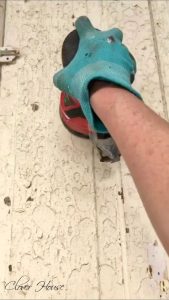
NOTE: Please use a mask and gloves when sanding to help protect you from possible lead paint particles.
First I used my little whisk broom to knock off all the large chips, the dust and cob webs that had built up on it while it was standing and waiting. Then I used my rotary sander and some 220 grit sand paper to knock off all of the big pieces of chippiness. Lastly I gave it a good dusting with the air compressor and then wiped it down with some soapy water and let it dry real good.
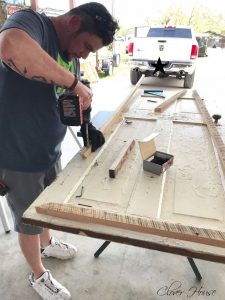
The door wasn’t quite wide enough to cover our opening, so we had to add a frame to it to make it fit better. We picked out some of our treasured barn wood like we used for this project and also this one, to create the frame around the door.
After all the pieces were cut to fit, he created pocket holes using his drill and our Kreg Jig Jr. to make the screw holes so that the screws wouldn’t show in the final project.
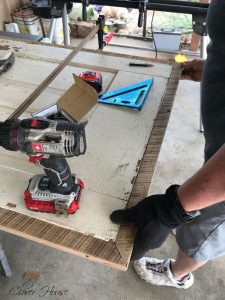
It’s pretty much like making a picture frame using the chop saw my honey cut each corner at a 45 degree angle.
To help hold the frame pieces in place while placing the screws, my honey used an adjustable woodworking clamp to hold the frame together so it would stay straight while he got all the screws tightened down.
We used 2″ long screws to attached the frame pieces to the door all the way around.
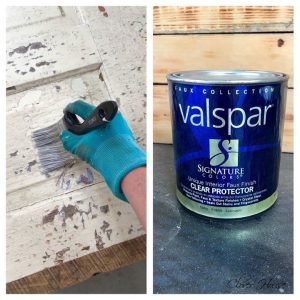
After the frame was in place, I used a water based, non-yellowing clear protector to seal all the chips into place. I wanted to preserve that gorgeous chippy look I had. Normally I use a foam brush to apply this sealer, but this time I used an old cheap 3″ brush to apply the sealer because the surface was extremely rough and the foam brush wouldn’t have lasted five strokes in.
After I slathered on a good thick coat of sealer, I let each side dry for a good 30 minutes before we applied the sliding door hardware. We used an Everbilt Decorative Sliding Door Hardware Kit to hang our door.
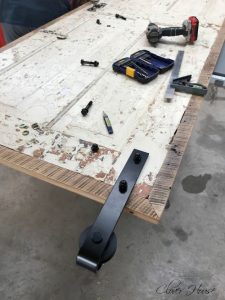
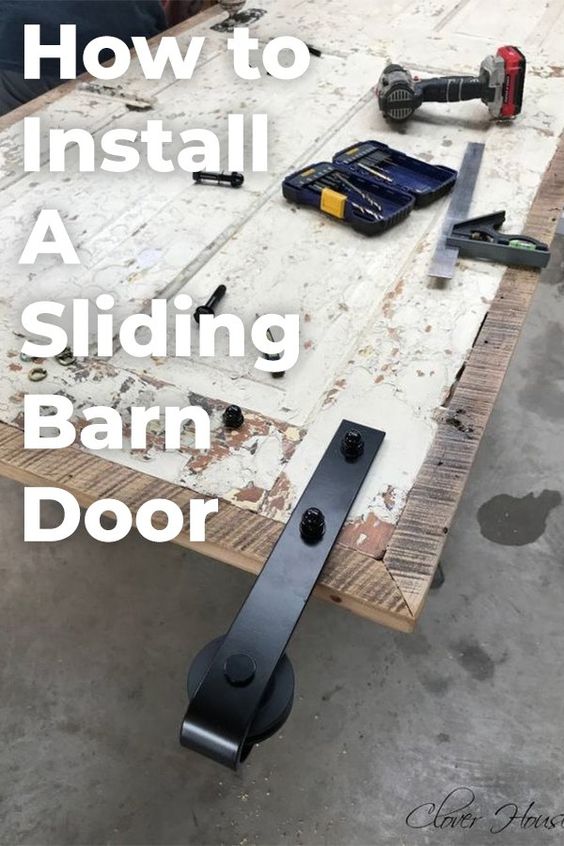
Now on to installing the hardware to the door. Make sure you read the directions at least twice! Its the equivalent to “measure twice, cut once”. You really want to make sure you’re doing everything right so you don’t ruin your door! First, drill the holes for your bolts.
See that sliding, leveling ruler there? It is your friend and you need it for this job. Everything has to be just right to make your door function properly.
Install the bolt and washers along with the slider pulley thingy…that’s the technical term for it!:) We ended up using extra washers to take up space because the bolts were a tad bit to long for our door thickness. No worries, the kit had extras just in case of that problem right there!
The hanging bar comes with the holes pre-drilled. Our house is old and weird and we ended up needing to drill extra holes to match our studs. Hopefully you won’t have to do that step. You must use a long level to make sure you’re installing a level bar, otherwise, your door will not operate properly.
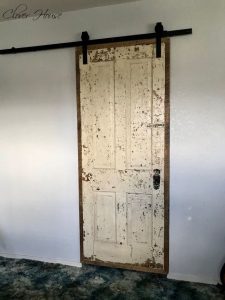
Here it is all installed. At this point here is the conversation we had:
HIM: “I’m sorry baby, but that thing is ugly.”
ME: Oh no! Really, do you think so?
HIM: Yeah, I just don’t care for it.
ME: Well, I love it, maybe it’ll grow on you?
HIM: I don’t know?
ME: Ok, take it down and we’ll start over.
HIM: No! I’m sure it’ll grow on me.
LOL! That’s why I love this man so much, he’s the best! Thank you baby for always going along with all my “bright” ideas! 🙂
Of course this little project has prompted me to do like five more projects, so my list of things to do grows longer!
Like get rid of this 1980’s carpet and linoleum that’s still in here in our master bedroom and bathroom! Gosh! If you want to see what all we’ve done in the bathroom so far, I have some clickable links over on our blog, link below.
Have you ever installed a sliding barn door? Did you use a vintage door or build your own? Let me know in the comments down below.
Thanks for looking!
source:hometalk.com by DeeDee

Related Articles:
-

Scientists Confirmed: This Is The World’s #1 Food For Hypertension, Heart Attack, Stroke and Cholesterol! -

GERMAN POTATO PANCAKES -

Cheeseburger Pie: It’s Quite A Delicious Concoction -

Arizona Sunshine Lemon Pie -

Earthquake Cake -

Princess Charlotte Turns 2, And This Birthday Photo From Kate Will Melt Your Heart!