Hi there it has been awhile since I last posted! I have been busy with the 2 kiddos and the hubby working out of country. But I am here now so I shall share my latest project.
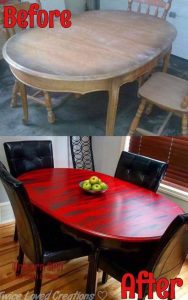
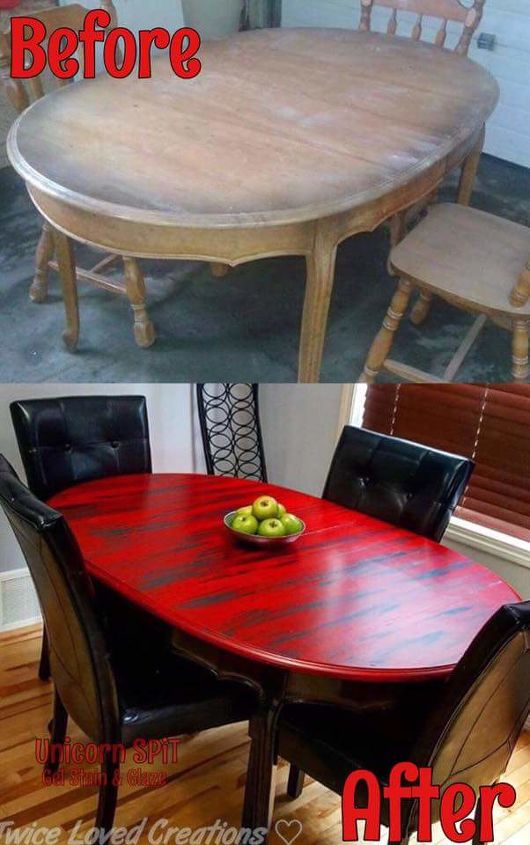
Before and after
This is where the table started and here is where it finished.
Step 1: I first I applied a gel stripper, any gel stripper will do. I find the gel works better, stays on the table little easier. After sitting for about 10 minutes I then took a scrub brush and scrubbed the old finish, paint and dirt off the table.
Step 2: Once the finish was off I then took warm soapy water and washed the table really well removing any residue left behind by the stripper.
Step 3: I then went over the table with a light sanding to try and make the table top smooth, unfortunately there was large chunks of the table top missing.
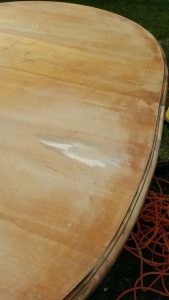
Step 4: So as I mentioned I’m at home usually with my two little ones, unfortunately I just didn’t have the time or inclination to go to the hardware store to pick up some wood filler. I don’t think wood filler would have helped as a lot of the gouges were about 1 inch wide by 2 inches to 3 inches long so unfortunately there was no real way of saving the wood grain of the table without seeing the color difference underneath the stain. I did have on hand pixie dust texture,I decided to mix up some texture into more of a putty like paste I then stuck it on the table and filled in all of the gouges holes and gaps.
Step 5: Once the texture was dry I went over the table with another sanding to make the tabletop even and uniform.
( I also used my home right sprayer to paint the legs using Rust-Oleum black oil based paint then let that dry and the legs were done. I made sure to cover the table top in plastic to ensure thatthe black paint didn’t get on the prepped top)
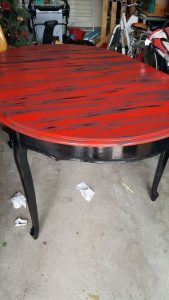
Step 6: I then went over the entire table with unicorn spit in Molly red pepper. Once the entire table was covered I let dry then did a quick spray seal with tremclad clear spray.
Step 7: After the clear coat was dry I then put some unicorn spit in Midnight Blackness on the table top with some short and long lines. I dragged my hand in straight lines across the SPiT to give it a unique look.
Step 8: Once the midnight Blackness had dried i then again did a quick spray of tremclad clear to seal the spit. I was then free to use whatever type of sealer I wanted which I decided to go with poly-acrylic until my epoxy could arrive unfortunately I’m on a three-week wait for that to arrive.
Once your sealer dries it’s then good to go. Do several coats to make sure that you retain durability, also by using clear lacquer spray before any other coating will keep your color bright and true. I highly recommend lightly sanding in between each coat of sealer to keep that smooth finish.
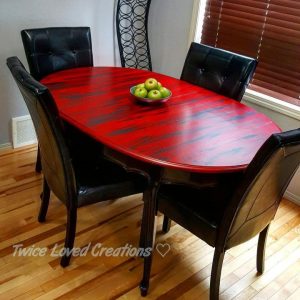
Finished and setup until I can get my hands on my epoxy. ( This will give me a much better and stronger finish)
Check out my blog!
twicelovedcreations.com

