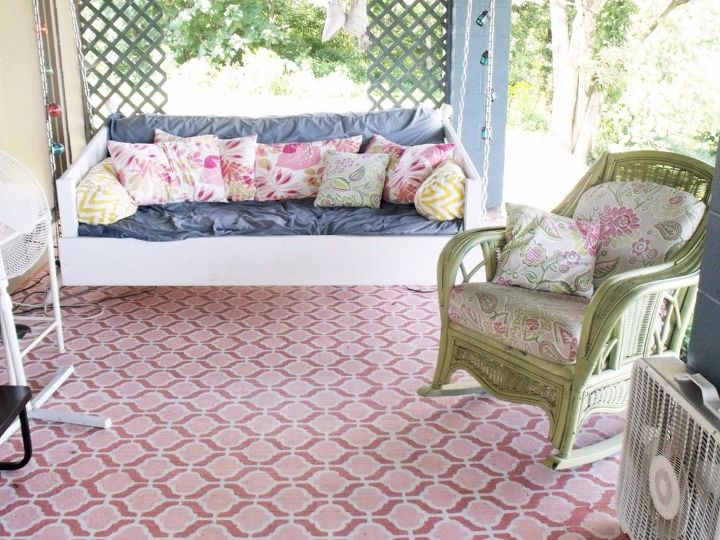
I saw a picture of a beautiful porch in a magazine. I knew instantly I had to have that porch floor! Mine isn’t as perfect as the picture, but I love it anyway! My porch has been transformed with a stencil, a little paint and some elbow grease!
This project is not at all technically difficult, but it is time consuming.
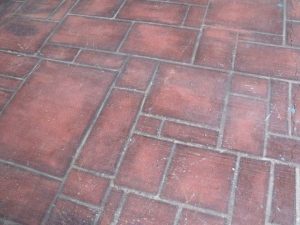
The dark and ugly before.
I had painted this pattern on the porch the year before. I actually liked it at the time! What was I thinking? My porch floor was rough and had rust stains on it. Pretty ugly to say the least. So I decided to paint it! To get the brick look, I painted a base color to be the mortar. Then I taped off each brick in a random pattern and painted on the reddish color. I thought the contrast was too stark and the mortar lines were too wide, so I went back and freehand painted the “aged” look on the edges. Better than it was, but not good!

A bigger picture of the before. Very dark!
As you can see the dark floor gave an overall dark appearance to this space. This just did not work with my riverfront view! PS. See the hanging bed? I built this with directions from the internet and scrap wood! The only parts I purchased for the bed itself were the chains, hooks and knobs! A futon mattress fits it perfectly. I love this bed!
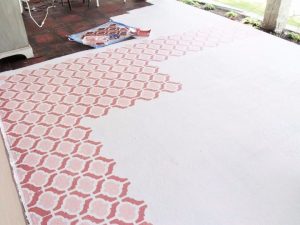
The start of something new!
The porch floor in the magazine picture had this design. I was lucky enough to find the 18″ X 18″ stencil on Etsy for $12.99. I chose 3 paint colors in the same color family at Sherwin Williams Paints. I painted in sections because my porch is quite large. I rolled on the background color and then stenciled the other two colors one at a time. I used a small roller on the stencil since the project was so large. This caused paint to collect on the back side of the stencil. I had to periodically remove the dried paint with a scraper. That was the worst part of the whole job!
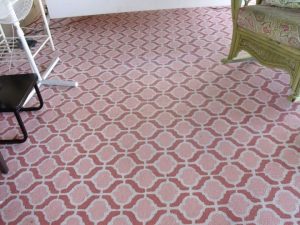
Ta da!! Finished and gorgeous. Happy Mama!
Once the stenciling was completed I topped the entire floor with a concrete sealer. However, the surface will still scratch if furniture is dragged around on it. Guess you know how I know that!
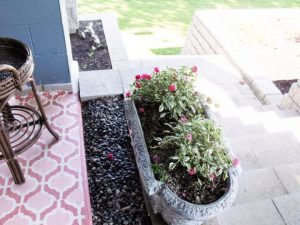
Down to the river!
Now I am just showing off! My nephew built this stairway and the retaining walls for the planting areas using landscaping blocks. He did a fabulous job! Of course he worked from the bottom up on the stairs and the end result was within 1/4″ of the existing porch! Amazing! I had an empty space between the porch and the wall. I put some black pebbles in the empty space and a concrete planter on top of the wall. I probably should not point out my faux pas but people will surely see them anyway. LOL I had not trimmed the blue paint on the bottom of the columns when these pictures were taken. You can see where my stencil did not perfectly match with the edge of the porch. All 4 edges of the porch had to be trimmed with paint. The stencil would not fit entirely next to the wall and the other edges are beveled.

Time for a nap!
Love my porch! See the wicker rocker? Again, free!! I made a purchase from Craigslist and when I went to pick up my purchase, the fella gave me this chair and the matching love seat just because he wanted rid of them! WOW!! I spray painted the wicker lime green and recovered the cushions in matching outdoor fabric.
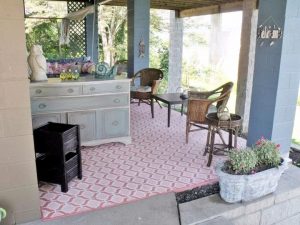
I love this design and how much brighter the whole area is! Notice the serpentine front dresser? I picked this up at a used furniture store for $39! And he delivered it for free. Gotta love that. I threw a little left over paint on it, shabbied it up a bit and put it on the porch. It comes in very handy for storage and provides an anchor for the sectional couch behind it. My daughter gave me the wicker chairs along with 2 more chairs and a dining table to match. All of which have now been painted baby blue and moved to another location. I am the queen of free stuff! LOL

