“OLD?” It’s all in how you decide to “mature.” Out of necessity, I removed the steps built by a Contractor and built new ones – the right way! In the process, I discovered that I LOVE building, and I’m excited to be starting more building projects – at 71 (and I’m a girl)! Here we go…. First pic is what the Contractor built for me.

Notice the waves? The brick supports? The long drop from the lower step? He must have forgotten to measure the height from the ground to the door and then forgot the standard 7″ step height code as well as all steps must be the same height…. When he got to the bottom, he had to push dirt up under the risers, but couldn’t push enough so also used bricks on their sides as supports for the risers.
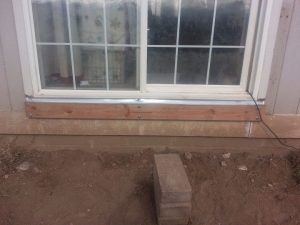
I have never built steps before, so I took note as I removed the Contractor’s steps. I found rotted wood up under the bottom of the door frame, so I removed all the wood and pushed a small pvc pipe up into that space, and I attached white flashing to stop any water from getting behind the new steps.
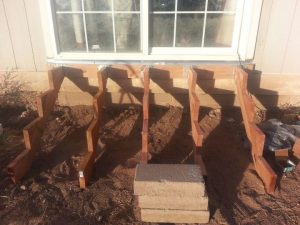
I discovered that the brackets used were incorrect and purchased the same bolts that came off with the old steps and the correct brackets to hold the risers. I drilled holes in the ledger board and the risers before attaching the brackets. NOTICE: I made the mistake of not leveling and placing concrete patio blocks under the bottom of the risers! Don’t do this!
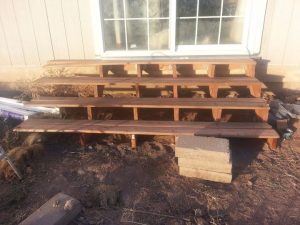
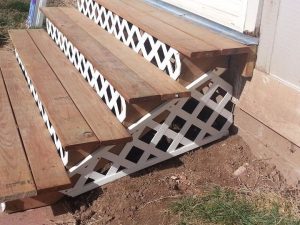
This picture shows the step boards all hanging off to the left. I was hoping to only have to cut one end, but a few boards were a bit warped on one end, so the next picture shows how I placed them to use the straightest portions of the boards.
I used 2 deck screws to attached each board (2 per step) to each riser. Then I cut the ends on each side leaving a little overhang on each end.
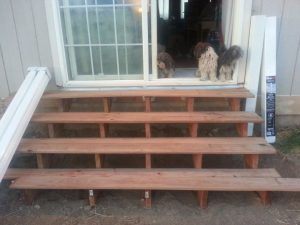
The dog 2nd from the right is a digger, and she teaches the others.
The dog 2nd from the right is a digger, and she teaches the others.
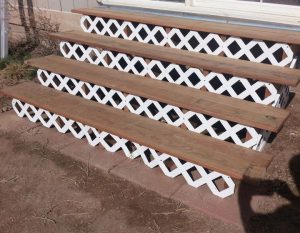
To stop the digging (tunneling along the foundation), I cut lattice strips and attached them to the risers between the steps.
NOTICE: I now have patio paaverss under the risers (so they aren’t resting on dirt or mud and have solid support on the bottom). This was extremely difficult to do after they were at this stage of construction.
I later added a few more rows of patio pavers.
NOTICE: I now have patio paaverss under the risers (so they aren’t resting on dirt or mud and have solid support on the bottom). This was extremely difficult to do after they were at this stage of construction.
I later added a few more rows of patio pavers.
I attached latice t the risers on each side as well and put a cap on the top and bottom.
I used a RotoRazor Saw to cut the lattice. LOVE that tool!
I used a RotoRazor Saw to cut the lattice. LOVE that tool!
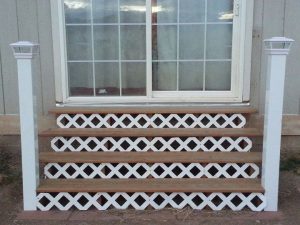
As you can see, I placed the patio pavers to extend on each side so I would have a foundation for the posts. Inside each white post sleeves is a 4×4 solid wood post which is attached to the riser with a long bolt counter-sunk into the wood post. (I didn’t dig post holes, because I plan to build a deck with stems and footings to later add a roof and walls.)
The railings haven’t been cut to size yet. In this picture, you can see that the change in temperature has allowed the pvc pipe to come outon the ends, so I’ll have to attach that to keep it in.
The post caps are solar lights.
The railings haven’t been cut to size yet. In this picture, you can see that the change in temperature has allowed the pvc pipe to come outon the ends, so I’ll have to attach that to keep it in.
The post caps are solar lights.
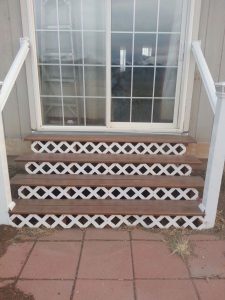
This picture shows the hand railings almost completely attached. I used a heavy duty sealer as these steps get constant Southern exposure at 8,000 ft. altitude in sunny Southern Colorado.