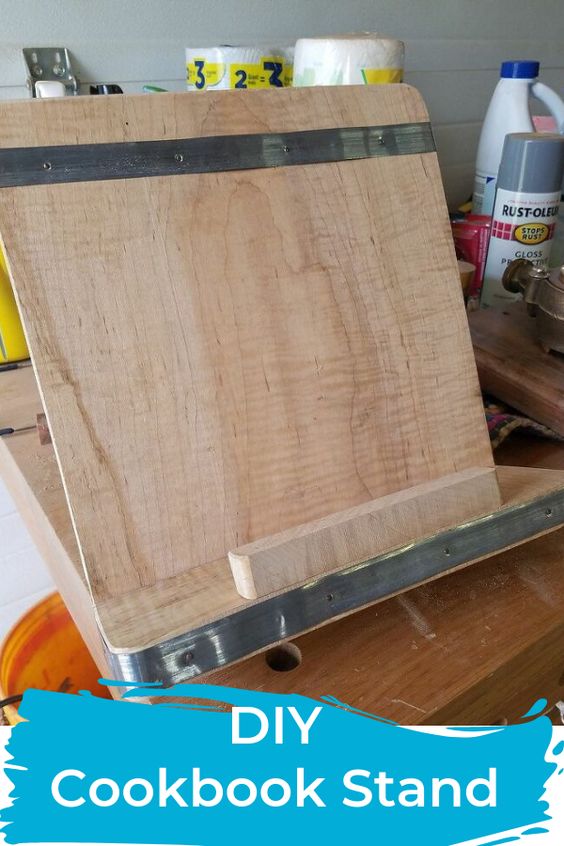

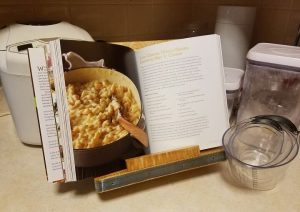
Awhile back I saw a really cool reclaimed wood cookbook/tablet stand advertised in a catalog. But the $110 price tag was a big “no, thanks” for me. Here is a tutorial on my version with plenty of options for you to customize a couple of your own.
All of the materials used were on hand, so there was no cost involved other than an afternoon of our time. In the complete blog, I offer tons of suggestions for alternate materials, trim and finishes. Check it out!
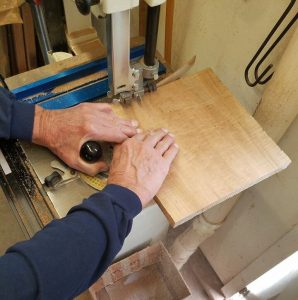
1. Select and cut wood. For my project, I chose a nice piece of 1″ maple that my dad (who helped me with this) had in his shop. You could probably go as small as 3/8″ as long as the wood is sturdy.
We looked at the whole board, then selected the area with the nicest grain pattern for the main part of the cookbook stand. After cutting the pieces as listed below with a circular saw, he then squared the two larger boards on the bandsaw. The edges were also slightly rounded on the bandsaw and then smoothed in Step 2.
- 11″ x 11″ for the main board
- 4″ x 11″ for the shelf (cut with the grain, not against, for structural strength)
- 3/4″ x 6″ for the stop
- 6″ x 4″ angled at 30° for the support
An Incra Miter Gauge V120 on the bandsaw was a big help in setting a cutline for the angle.
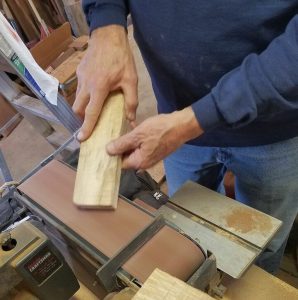
2. Sand as needed. Next, we lightly sanded all of the wood pieces on the belt sander. We kept it pretty rustic but softened the edges a little.
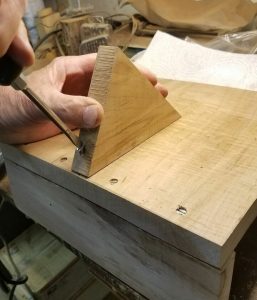
3. Assemble pieces. First, we attached the shelf board with four countersunk 1-1/4″ flathead screws from the back of the larger board. The front bumper was attached to the shelf with four nails from the bottom. For the support, we measured the center of the board and attached with two 1-1/4″ flathead screws angled into the wood.
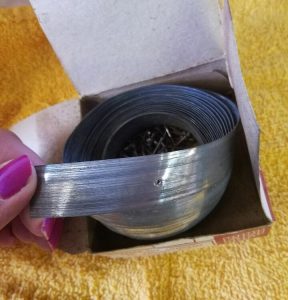
4. Add decorative trim. I really liked the metal-look trim on the inspiration project so I wanted to mimic it somehow. My dad found a couple of boxes of old 3/4″ linoleum edge binding that fit the bill perfectly!
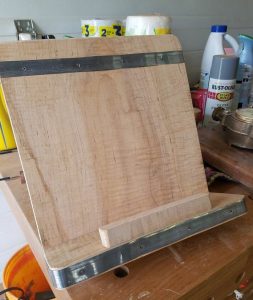
The edge binding had pre-spaced holes on it, and the box included little nails (“pins”) that made attaching the metal to the wood pretty simple. The trim was very bendable and we were able to add extra nails where needed with no issues. We added a strip across the top and one across the baseboard, wrapping the ends around the back about 1/2″ and securing them with the nails.
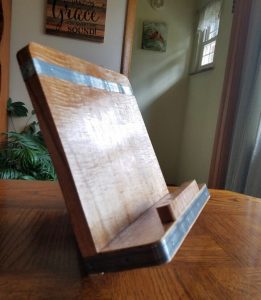
5. Apply finish. For our project, we brushed on two coats of clear polyurethane finish to bring out the maple’s grain a little and to enhance durability.
Customize It! You can achieve a variety of looks with brush-on or wipe-on stains, including General Finishes Water Based Wood Stain in Whitewashed, Weathered Gray and Espresso. Rust-Oleum’s Weathered Wood Accelerator can give new wood a reclaimed look. An interesting twist would be to paint the back with Rust-Oleum Chalk Board Paint and create a writeable, erasable surface. You could also paint your project in a color to match your décor using Black Dog Salvage Furniture Paint or General Finishes Milk Paint. A meaningful touch would be to woodburn the recipient’s name/initials, a quote or design, or even better—one of Grandma’s recipes in her own handwriting.
Check out the complete blog (link below) for tons of suggestions for alternate materials, trim and finishes.
Make your own! There are many, many ways you could personalize a cookbook/tablet stand with a specific person in mind or tailor-make one to your own taste. Take the basic idea presented here and truly make it your own.
Whether the chef or baker in your life uses a hardback cookbook, a spiral-bound cookbook, a foodie magazine, a tablet—or all of the above—for their mealtime inspiration, a gift made from the heart would surely make mealtime prep more enjoyable.
source:hometalk.com by Lori Haught Harper